
Ar Build Tools: A Comprehensive Guide for Developers
Are you a developer looking to streamline your Android app development process? If so, you’ve come to the right place. In this article, we’ll delve into the world of Android build tools, providing you with a detailed and multi-dimensional introduction to help you make informed decisions about the tools you choose to use.
Understanding the Role of Build Tools

Build tools are essential components of the Android development ecosystem. They automate the process of compiling, packaging, and deploying your Android applications. By using build tools, you can save time and reduce the likelihood of errors in your code.
One of the most popular build tools for Android is Gradle. Gradle is an open-source build automation tool that builds upon the concepts of Apache Ant and Maven. It allows you to define your project’s dependencies, tasks, and configurations in a single build script.
Exploring Gradle
Gradle is a powerful tool that offers a wide range of features. Here’s a closer look at some of its key components:
- Build Script: The build script is the heart of your Gradle project. It defines the project’s dependencies, tasks, and configurations.
- Tasks: Tasks are the building blocks of your build process. They represent actions that Gradle can perform, such as compiling source code, running tests, and packaging the app.
- Dependencies: Dependencies are the libraries and modules that your project relies on. Gradle allows you to manage these dependencies in a centralized manner.
- Plugins: Plugins extend the functionality of Gradle. There are many plugins available for various purposes, such as testing, code quality, and continuous integration.
One of the most significant advantages of Gradle is its flexibility. You can customize your build process to suit your specific needs. For example, you can define custom tasks, configure build outputs, and even create your own plugins.
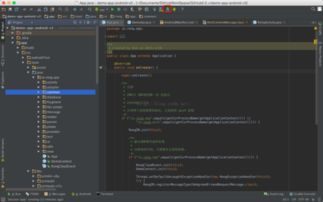
Using Gradle with Android Studio
Android Studio is the official IDE for Android development, and it integrates seamlessly with Gradle. Here’s how you can use Gradle within Android Studio:
- Open Android Studio: Launch Android Studio and create a new project or open an existing one.
- Configure the build system: In the project structure dialog, select “Gradle” as the build system.
- Define your dependencies: In the build.gradle file, add the necessary dependencies for your project.
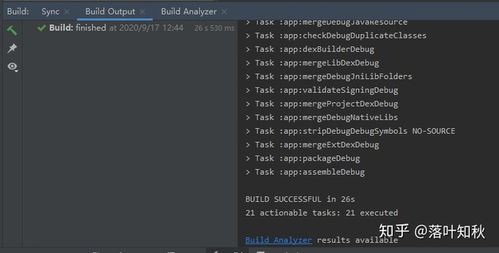
- Run your build: Use the “Build” menu to compile and run your project.
Android Studio provides a user-friendly interface for managing Gradle builds. You can view the build output, debug build issues, and even customize the build process using the IDE’s settings.
Other Build Tools for Android
While Gradle is the most popular build tool for Android, there are other options available. Here’s a brief overview of some alternative build tools:
- Maven: Maven is a popular build tool for Java projects. It uses a convention-over-configuration approach and is widely used in the Android community.
- Ant: Apache Ant is an older build tool that is still used by some developers. It is a task-based build tool that uses XML configuration files.
- FB SDK Build Tools: The Facebook SDK for Android provides a set of build tools that simplify the integration of Facebook features into your app.
Each of these build tools has its own strengths and weaknesses. The best choice for your project will depend on your specific requirements and preferences.
Best Practices for Using Build Tools
Here are some best practices to help you get the most out of your build tools:
- Keep your build scripts clean and well-organized: A well-structured build script is easier to maintain and understand.
- Use version control: Store your build scripts in a version control system to track changes and collaborate with other developers.
- Optimize your build process: Identify and eliminate bottlenecks in your build process to improve efficiency.
- Stay up-to-date: Keep your build tools and dependencies up-to-date to take advantage of the latest features and security updates


